Learn the essentials of hardware wallet setup in our comprehensive guide, covering Ledger and Trezor to secure your cryptocurrency effectively. Securing your cryptocurrency assets is crucial in the current digital landscape, where cyber threats loom large. One effective measure to bolster security is utilizing a hardware wallet. Among the top-tier options available, Ledger and Trezor stand out for their robust security features designed to protect digital assets and private keys by storing them offline. These reputable hardware wallets support a wide range of cryptocurrencies, providing users with a secure storage solution.
The popularity and trust placed in Ledger and Trezor by individuals looking to safeguard their digital investments highlight the reliability and effectiveness of these devices. By opting for hardware wallets like Ledger or Trezor, users can actively manage their crypto holdings while ensuring the highest level of security.
For those seeking to take charge of their cryptocurrency portfolio, this blog serves as a valuable resource. It offers a detailed, step-by-step guide on setting up and using Ledger and Trezor wallets, empowering users to navigate their wallets confidently while keeping their private keys secure. This comprehensive guidance ensures that users can efficiently manage their crypto assets without compromising on security, thus providing peace of mind in an increasingly digital world.
Key Highlights
- A hardware wallet like Ledger or Trezor is essential for safeguarding your crypto assets and securely storing private keys offline.
- Use the Ledger Live app or Trezor Suite to manage, stake, and transfer thousands of cryptocurrencies and digital assets.
- Before starting, ensure compatibility with your operating system, such as Android, MacOS, or Linux.
- Learn how to set up a secure environment, back up your recovery phrase, and protect your wallet with a password.
- Follow this step-by-step guide to initialize, connect, and use your hardware wallet effectively.
Understanding Hardware Wallets: Ledger & Trezor Explained
Hardware wallets such as Ledger and Trezor are essential devices designed to securely store private keys for cryptocurrency assets offline. Unlike software wallets, hardware wallets ensure that private keys are kept offline, minimizing the risk of hacking since sensitive information is not exposed to the internet.
Ledger wallets offer users access to Ledger Live, an intuitive application that enables transactions, staking activities, and portfolio management. On the other hand, Trezor users can leverage Trezor Suite, a user-friendly platform for handling digital assets and managing various cryptocurrencies. These solutions provide a safe and convenient way for individuals to engage with their digital and crypto assets without encountering security issues.
In addition to keeping private keys secure, hardware wallets also offer added layers of protection through features like PIN codes and seed phrases. These devices are crucial for anyone looking to safeguard their cryptocurrency investments from potential cyber threats and unauthorized access. By utilizing hardware wallets, individuals can have peace of mind knowing that their assets are stored in a highly secure environment.
What Are Hardware Wallets and Why Use Them?
A hardware wallet serves as a secure and offline storage device for safeguarding your private keys, thereby protecting your cryptocurrency assets from online threats. By keeping your digital assets in a hardware wallet, you can mitigate the risk of theft by malicious individuals seeking unauthorized access to your funds. Unlike software wallets that are constantly connected to your computer or phone, a hardware wallet provides an extra layer of security by storing your private keys in a location less susceptible to hackers.
The private keys stored within a hardware wallet are crucial as they grant access to your crypto holdings. If these keys fall into the wrong hands, it could result in the loss of your funds. With a hardware wallet, however, your private keys remain securely stored within the device, enhancing the overall security of your digital assets.
Whether you are new to cryptocurrencies or an experienced user, incorporating a hardware wallet into your security practices is essential for protecting your digital wealth effectively. The robust security measures offered by hardware wallets make them indispensable for preventing unauthorized access to your digital assets. This additional security feature ensures that only authorized individuals can access and manage your cryptocurrency holdings, minimizing the risk of potential breaches or cyber attacks.
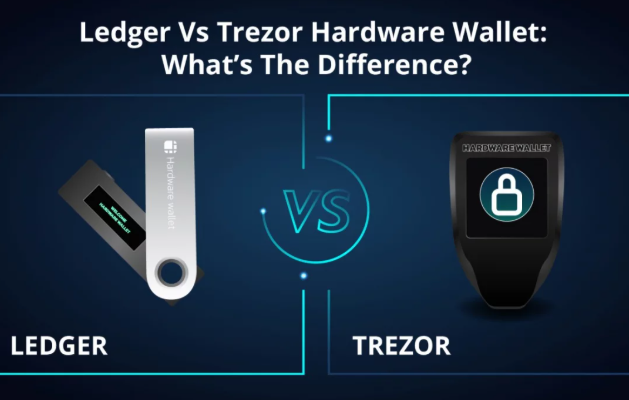
Key Differences Between Ledger and Trezor Devices
Both Ledger and Trezor are hardware wallets that focus a lot on security and how they work. But there are a few things that set them apart, and this can change which one you might pick.
| Feature | Ledger | Trezor |
|---|---|---|
| Connectivity | USB, Bluetooth (for some models) | USB |
| Supported Platforms | Android, MacOS, Windows, Linux | Android, MacOS, Windows, Linux |
| Device Display | Has advanced display with Secure Element | Clear screen, touchscreen on some models |
| Companion Software | Ledger Live | Trezor Suite |
| Ease of Recovery | Has standard and encrypted backups | Uses seed phrase and Multi-share Backup |
Ledger puts effort into using strong security with special Security Element chips inside. Trezor is easy to use and gives options such as passphrase help and different ways to recover your account. Both offer high security and good functionality, but which one is best depends on what you want and the way you like to use things like android, macos, usb, and linux in your day-to-day. Ledger Live and Trezor Suite both help you handle your crypto in different ways.
What You Need Before Getting Started
Good preparation helps you set up your wallet more easily. First, check if your hardware wallet works with your device’s operating system. This can be Android, MacOS, or Linux. Then, get all the things you need, like the USB cables that come with your wallet. This will help you connect everything without problems.
Make sure you have a steady internet connection. Find a safe and quiet place so you can do the setup right. Doing these things will lower problems and help you keep your crypto assets safe.
Compatible Devices, Software, and Accessories
Before you set up your hardware wallet, make sure it will work with your devices and operating system. You should know that both Ledger and Trezor work on many platforms.
- Compatible Devices: You can use Android phones, MacOS laptops, Windows desktop computers, and systems that run on Linux.
- Apps Needed: Be sure to download Ledger Live if you use Ledger, or get Trezor Suite if you use a Trezor wallet.
- Accessories Included: You will find USB cables inside the box, so you can connect and update your wallet with ease.
Some Ledger wallets also let you use Bluetooth. This helps you connect wirelessly for more options. Always check that your device meets the needs shown by the maker before you start the setup. This can help stop problems with compatibility. Also, keep backup cards or a safe way to recover your wallet nearby. This is very important if you lose your access.
Setting Up a Secure Environment for Installation
Creating a secure setup area is essential to safeguard your wallet and digital assets from potential threats. One of the initial steps is to establish a robust password for accessing your hardware wallet, avoiding simple PINs or common codes that may be easily guessed by others.
It is crucial to download the correct software for your wallet, such as Ledger Live or Trezor Suite, only from the official manufacturer’s website to ensure safety and eliminate the risk of downloading from unauthorized sources. Refrain from using apps or software from untrusted sources to prevent malware infiltration.
Regularly check your computer or mobile device for any signs of malware to maintain a secure environment. Initiate the setup process while disconnected from public Wi-Fi networks to keep your sensitive information confidential. By prioritizing security measures during setup, you fortify the protection of your wallet, password, and entire digital asset portfolio right from the outset.
Step-by-Step Guide to Setting Up Your Hardware Wallet
Whether you pick Ledger or Trezor, setting up your wallet is simple but very important. From the time you open the box and check your device to connecting it, installing software, and making a recovery phrase, each step helps protect your digital assets.
Below, you will see the main steps. These steps cover how you set up the device, get it ready, add accounts, and move your funds. This setup will help you use your Ledger or Trezor wallet with confidence and keep your digital assets safe.
Step 1: Unboxing and Verifying Your Device
Once you get your hardware wallet, look at the package. Make sure the holographic seal is in place and no one broke it. If you see anything that looks wrong, do not use the device. You should get in touch with the maker for help.
Open your Ledger or Trezor wallet with care. Check inside for all items, like USB cables and recovery phrase cards. Get to know the way the buttons and screen on the wallet feel. At this time, look at the serial number and see that it matches what the wallet maker gave. This helps you make sure it is the real product.
Next, use your computer or phone to connect the device and begin the setup. When you start with a device that you have checked, you help keep your crypto safe and away from danger.
Step 2: Connecting the Wallet and Installing Manufacturer Software
Connecting your hardware wallet to your computer or phone using the provided USB cable is the initial step in setting up your device. Depending on whether you have a Ledger or Trezor wallet, you will need to download the respective software – Ledger Live for Ledger wallets and Trezor Suite app for Trezor wallets. It is crucial to obtain these applications from the official manufacturer’s website to ensure security and authenticity.
Once you have downloaded and installed the appropriate software, follow the on-screen instructions to begin configuring your wallet. Pay close attention to any security prompts displayed on your wallet’s screen, as well as any verification steps required by your device or application. These measures are essential for safeguarding both your wallet and private keys from potential threats.
After installing the software, it is necessary to connect or synchronize your hardware wallet with the application to streamline the setup process. This synchronization establishes a secure connection between your device and the software, facilitating seamless communication between them. Upon completing this step, your hardware wallet will be fully operational, allowing you to finalize its configuration and ensure the protection of your private keys.
Step 3: Initializing, Creating, and Backing Up Wallet
The start of the process is when you take charge of your wallet’s safety. First, pick the “Create New Wallet” choice on your hardware wallet. The wallet will give you a unique recovery phrase:
- Write down every word on the card you get, in the same order as shown.
- Always keep the recovery phrase offline so it will be safe from people online.
- Confirm the phrase by typing it again into the wallet.
- Never give this recovery phrase to anyone else.
Add more safety to your wallet. Set up a strong PIN or password now. Using a recovery phrase with a PIN helps keep your hardware wallet safe from others who might try to get in.
Step 4: Adding Accounts and Transferring Funds
Once your wallet is set up, you can add cryptocurrency accounts. In Ledger Live or Trezor Suite, pick the coins you wish to keep, such as Bitcoin or Ethereum.
Moving funds is easy. Create a receiving address in the app. Start the transfer from your old wallet or exchange. Check each address to make sure it is right. At this time, you can also check out options like staking some digital assets to earn rewards.
When you add accounts and transfer funds safely, you use the full functionality of your wallet. This helps you keep, use, and even grow your digital assets with the app, ledger, or trezor.
Conclusion
To sum up, using a hardware wallet like Ledger or Trezor is important if you want to keep your digital assets safe. When you know the main differences between these wallets and follow the setup steps, you can make sure your cryptocurrency is protected. With a bit of time, the right setup, and paying close attention, you will be able to use the wallet with ease and feel good about how you keep your money safe. If you want help with how to use your wallet or the setup, you can get a free talk about the best ways to use Ledger or Trezor for your digital assets.
Frequently Asked Questions
Can I use Ledger and Trezor wallets with multiple cryptocurrencies?
Yes, both Ledger and Trezor wallets let you use many kinds of cryptocurrencies. With Ledger Live and Trezor Suite, you can handle lots of different coins like Bitcoin, Ethereum, and other types of altcoins. You also get to use strong wallet features for safety and for managing your coins well.
What should I do if I lose my recovery phrase?
If you lose your recovery phrase, it is very important to have a backup kept in a safe place. If you do not have it, you will not be able to get into your wallet or reach your crypto assets. Hardware wallets cannot get back lost phrases. So, always keep extra copies in safe, offline spots.
Is it safe to buy a hardware wallet from third-party sellers?
It is good to buy hardware wallets straight from the maker’s website or from sellers that are approved. Getting these wallets from other sellers can put your money at risk, because they might not be safe. Every time you get a new device, check that it is real when you open it. Make sure the device is set to default from the company.
How do I update the firmware on my hardware wallet?
To update the firmware on your wallet, connect your Ledger or Trezor device to its app. For Ledger, use Ledger Live. For Trezor, use Trezor Suite. Go to the firmware part in the app and follow what it tells you to do. Firmware updates help keep your wallet safe, so always check that you get updates from the main app made by the company.